Pancake Cake w/ Summer Berries

Pancake Cake w/ Summer Berries

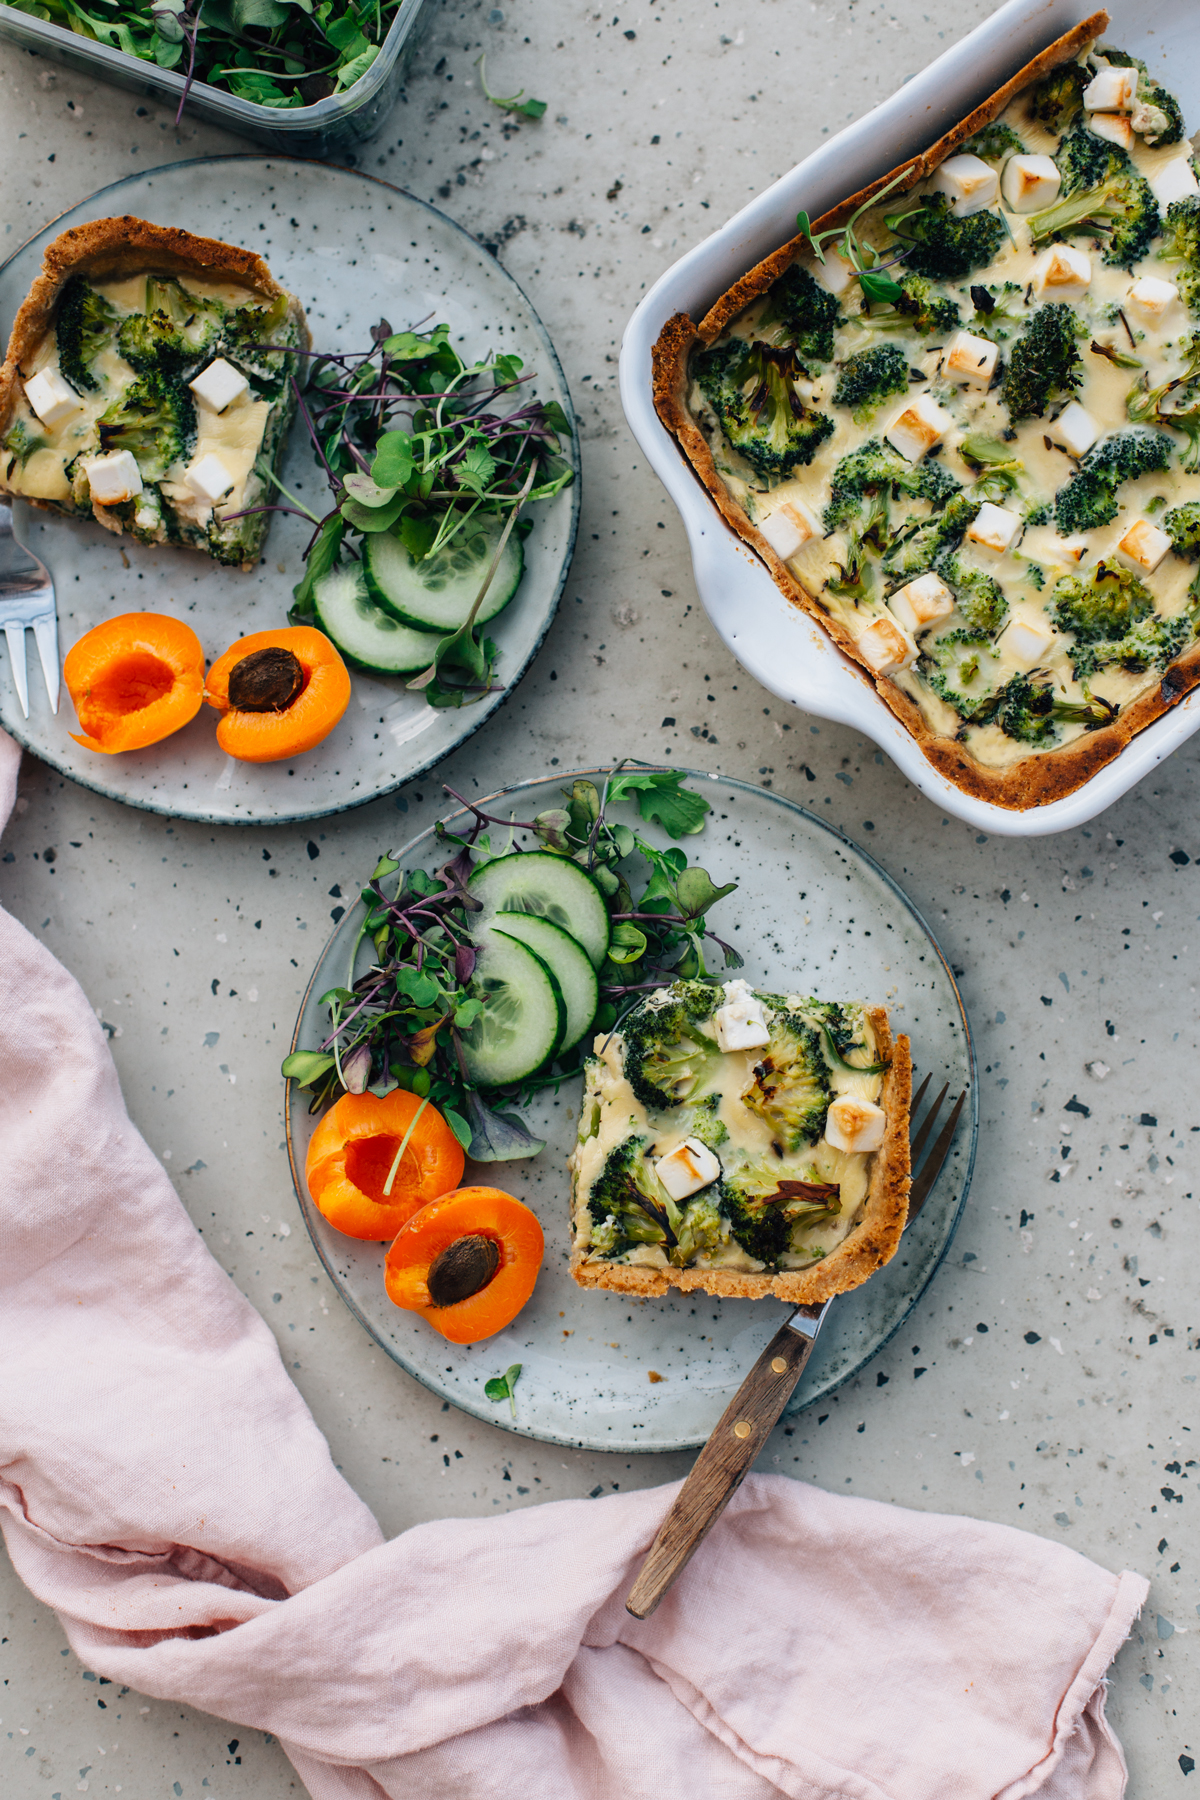
If you’ve been reading my blog for a while, you’ve probably noticed that I’m not a very traditional baker with exact measurements or fancy techniques. Actually, I’m the very opposite with a not-so-patient-character and a big desire for making things as easy as possible. A lot of my cookings are born with the idea of making as little mess as possible and simplifying things and techniques. Maybe a few of you are the same? I love food and cooking, but not so much that I’m willing to spend hours in the kitchen, at least most of times.

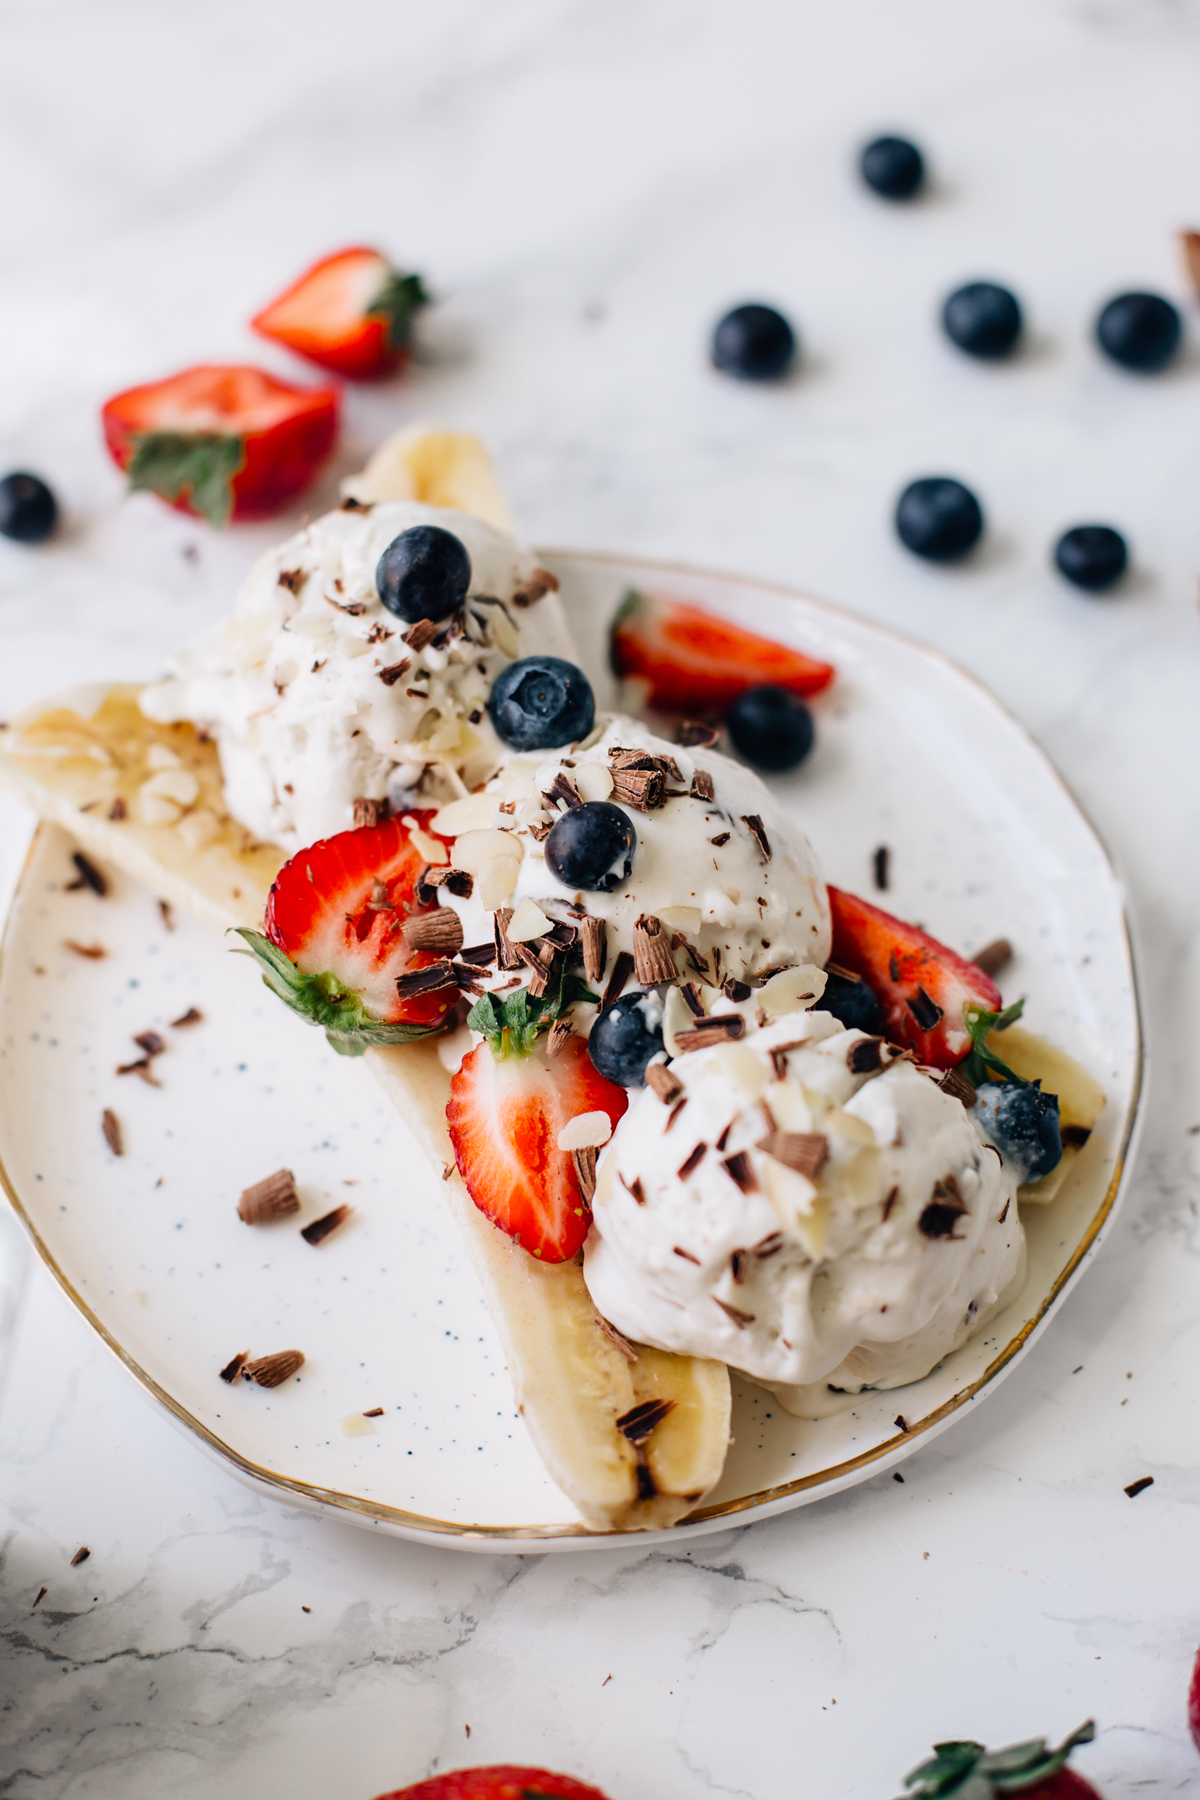
A few summers back I made this super easy gluten-free chocolate cake that has become unbelievably popular, and I felt like it was time for another cake as simple as that one is. Enter: Pancake Cake with Summer Berries! And no, I’m not declaring that pancake cake is anything new, but I make my pancake in a blender (!) and the fillings and toppings are very easy, which makes the whole process muy fácil. And that’s what I live for!

Pancake Cake w/ Summer Berries (gluten + dairy-free) | tuulia blog

I created this recipe originally for a Finnish berry company Pakkasmarja, but as my friends sent me messages asking for the recipe, I knew I wanted to share this with you too. Instead of using multiple flours, I made the pancake simply with rolled oats and mixed the batter in my blender. Genial, even if I say so myself. And once the pancake is baked and cooled, you just cut it into big squares and top the pieces with all sorts of goodies. When I was shooting these photos, I wanted to simplify things a bit and used a store-bought oat-based whipping cream, but you can use other (plant-based) whipping creams too, or make your own whipped coconut cream with a cream charger, that’s my favorite for cakes. When you have a cream charger, you can make fresh cream anytime rather than having to make do with that which comes in cans. Besides the cream, I filled the cake with berry mash, sliced banana and looooots of fresh berries. I also tested oat yogurt instead of the cream in one of the layers and it was delicious too! Next time I’m planning on using whipped coconut cream, fresh berries, and nectarines and peaches. Homemade apple sauce would be divine too. Or a sauce with stewed rhubarb. Or ice cream… Okay, you probably got the point that there are a lot of options here. So go with the ones you love!

Sending you lots of hugs from (finally) sunny and blue-skied Scandinavia and hoping you’re having a wonderful summer! xo

Pancake Cake w/ Summer Berries (gluten + dairy-free) | tuulia blog Pancake Cake w/ Summer Berries (gluten + dairy-free) | tuulia blog


Pancake Cake w/ Summer Berries

notes: if you don’t have a blender, you can prepare the dough by hand in a large bowl. in that case, use 2 cups of oat flour instead of rolled oats. If I’m looking for a short-cut, I sometimes use oat-based whipping creams (Oatly is my favorite), but other plant-based creams will do fine too. 

serves 6 to 8

Pancake:
1 1/2 cup gluten-free rolled oats
1 tsp baking powder
¼ tsp ground cardamom
a pinch of salt
3 organic eggs
3 cups oat milk (or other plant-based milk)
3 tbsp honey
2 tbsp organic butter (or coconut oil) 

Filling + toppings:
dairy-free whipping cream OR whipped coconut cream
mashed berries
banana, sliced thinly
fresh berries

METHOD:

1. Measure the oats to a blender and pulse into flour. Add all other ingredients except the butter and blend until smooth. Pour into a large bowl and let the batter rest for 20 minutes. Preheat the oven to 425 F / 225 C degrees.

2. Cover a baking sheet with baking paper and add 2 tablespoons of butter to the baking sheet. Place the baking sheet to the warm oven for a few minutes, until the butter has melted. Take the baking sheet from the oven and pour the pancake batter to the sheet. Bake for 25 to 30 minutes, until the pancake has got a beautiful golden-brown color. Allow the pancake to cool well before assembling the cake. Prep the fillings in the meantime.

3. Prepare the whipping cream and chop fresh berries into small pieces. When the pancake has cooled well, cut it into 4 to 6 equal pieces. Assemble the cake by piling pieces of the pancake, whipped cream, mashed berries, banana slices, and fresh berries on top of each other. Finish with lots of fresh berries, serve, and enjoy!

TallennaTallennaTallennaTallenna

A Summer Classic: Raw Strawberry Cheesecake

A Summer Classic: Raw Strawberry Cheesecake

So I made a cake. It was my husband’s birthday yesterday and being a food blogger and a passionate baker, I feel it’s my duty and calling to make a cake for my loved ones. And sometimes for myself too. But making a cake for someone else is a lot more fun. But okay, let’s get back to this cake. I posted a raw strawberry cheesecake recipe here on the blog a few years ago, but I felt it needed a bit of an update so I decided to make a new version of it. I chose to make it this weekend, as strawberries are now in their best season here in Finland, and this cake has a lot of them. I also got a bit carried away on the process…

You see, I intended to make a pretty two-layer cake and then top it with just fresh strawberries and coconut flakes. Like this.

A Summer Classic: Raw Strawberry Cheesecake with all the toppings | tuulia blog A Summer Classic: Raw Strawberry Cheesecake with all the toppings | tuulia blog

It’s pretty, but kind of minimalistic. And I felt like doing something over the top. So I got this idea to add some ice cream on top… and serve it with more ice cream. And yes, I did both of them.

A Summer Classic: Raw Strawberry Cheesecake with all the toppings | tuulia blog

And DAMN was it good. Like r.e.a.l.l.y. good.

The cake was super creamy, but not too ‘greasy’, like raw cakes sometimes are when you add a lot of coconut oil to the batter. I added only a few tablespoons of coconut oil to the filling and kept the batter really thick, and then sweetened it only with a banana and a very small splash of honey. The strawberries are now so sweet, that you really don’t need that much additional sweetener. Meaning you can have a huge scoop of ice cream on top of your slice. Hehe.

I’m starting to feel that this post is turning out totally different than it was supposed to be, but let’s see this ramble just as a declaration of love for summer, ice cream, and strawberries tasting like little pieces of heaven. And for the fact that’s it’s holiday season, time to ditch the city, and spend the next couple weeks at summer cottages and around the archipelago. Picture a very satisfies smiley face here. It’s me. I plan on making a lot more yummy recipes and eating all the berries I can find during the next couple weeks. I hope you guys are having a great summer and spending it in a way that makes You feel good. And eating strawberries too. Sending hugs to all of you guys, be well! xo


Raw Strawberry Cheesecake

notes: I rarely have very exact measurements when I make a raw cake, as I think it’s best to taste the filling as you make it and add some sweetener, berries, lemon juice, or something else, if I feel like the filling needs something more. so feel free to modify my recipes to your liking!

8-inch / 20 cm springform cake pan

Crust:
1 1/2 cup walnuts (or pecans / almonds)
a tiny pinch of salt
6-8 fresh dates, pitted

Filling:
1 1/2 cup cashews (soaked overnight)
1 ripe banana
1 big lemon, juiced
2/3 cup coconut milk
3 tbsp coconut oil, melted
1-2 tbsp organic honey (or maple syrup)
1/2 tsp vanilla powder
4 cups fresh strawberries

Toppings:
sliced strawberries, coconut flakes & (vegan) ice cream

METHOD:

1. Place the cashews in a big bowl, cover with water and soak overnight or for at least 4-6 hours until making the cake.

2. Start by preparing the crust. Add walnuts and salt into a blender or a food processor and grind until fine crumble. Cut the dates into smaller pieces and add in couple turns. Blend until you get a sticky dough. Line the bottom of a cake tin with baking paper and press the dough to the bottom of the cake tin. Place it in the freezer while making the filling.

3. Rinse the blender. Drain and rinse the cashews and add them to the blender. Add the banana, lemon juice, coconut milk, honey, 2 tbsp of coconut oil and the vanilla powder. Blend until very smooth and creamy. Taste, and add more honey / lemon juice, if needed.

4. Take the cake tin from the freezer and pour about 1/3 of the filling on top of the crust. Add about 2 cups of strawberries and 1 tbsp of coconut oil to the blender and blend until smooth. Pour the strawberry filling on top of the first layer and place the cake back to the freezer for 4-6 hours, until the filling has set.

5. When the filling has set, take the cake from the freezer and remove the sides of the cake tin carefully. Let thaw for 15-20 minutes before serving and then decorate with the remaining strawberries, coconut flakes, and some ice cream if desired. Serve, and enjoy!

6. The cake will remain good in the fridge for a couple of days, for longer periods, store in the freezer.

Grilled Portobello Pizzas & Vegetable Skewers w/ Lemon & Basil Oil

Grilled Portobello Pizzas & Vegetable Skewers w/ Lemon & Basil Oil

this post is sponsored by Puhtaasti kotimainen.

A few weeks ago I got to experience something new and fun, as we filmed a cooking video for Champ mushrooms in our inner yard. I got to throw a mini grill party and make two different recipes in a small kettle grill – for the first time in my life – and then we filmed it all! I’m definitely not an expert when it comes to grilling, but I do have a deep passion for simple and tasty summer meals, so I came up with two very easy, yet very delicious recipes: grilled portobello pizzas and grilled vegetable skewers with lemon and basil oil. They really are very simple and only require a few ingredients, so they’re very summer-cottage-no-amenities-friendly. Check out the video below and see me make them!

If you want to buy a new grill have a look at Wolfleys as they have some great buyers’ guides.

Grilled Vegetables with Basil & Lemon Oil | tuulia blog

These grilled portobello pizzas were an instant favorite among all my taste testers and they really are that good. Grilled portobellos are very tasty in itself (and great for burgers!) but I really love stuffing them with different kinds of toppings. This time I went for very simple flavors and made the pizzas with tomato paste, fresh tomatoes, bufala mozzarella, and fresh basil. Next time I’ll try spinach, olives, herbs, and maybe feta, so there are lots of options for toppings. And if you’d like to make a vegan version, you could go for a vegan cheese, or just add lots of veggies or other tasty toppings, like artichokes and sun-dried tomatoes.

For my other recipe I wanted to use champignon mushrooms, so I made vegetable skewers with the mushrooms, cauliflower, and zucchini. My secret to tasty grilled vegetables is to marinate them after they’ve been grilled, not before. Adding the marinade to the already grilled vegetables makes them really flavorful, and also that way you won’t have to worry about dripping all that tasty marinade to the charcoal / gas. Grilled cauliflower and zucchini are my favorites, but cherry tomatoes, broccoli, corn, or even watermelon and pineapple would be great in these skewers too. And I also love grilled apple!

You’ll find both of the recipes below and from the Puhtaasti kotimainen site, which has lots of other recipes too, including a few ones I made for them last summer. I hope you like the video and the recipes, and I wish you all a wonderful, relaxing, and tasty midsummer weekend! Enjoy, friends! x

Grilled Vegetables with Basil Lemon Oil | tuulia blog


Grilled Portobello Pizzas

makes 4 pizzas

4 portobello mushrooms
1 tbsp olive oil
3-4 tbsp tomato paste
a handful of cherry tomatoes or 2 tomatoes, sliced thin
1 ball bufala mozzarella, sliced
fresh basil
salt & black pepper

METHOD:

1. Warm up the grill. Clean the mushrooms gently and remove the the stem. Remove brown gills from the undersides of mushroom caps using a spoon. Brush a bit of olive oil over both sides of the mushrooms and add a pinch of salt.

2. Place the mushrooms bowl side down and grill for about 5 minutes, until the mushrooms have a bit of color. You can also fry the mushrooms on a grill pan. Take the mushrooms off the grill or pan, or fill the mushrooms directly in the grill, if it’s not too hot.

3. Flip the mushrooms and spread a bit of tomato paste on the bottom of each portobello. Fill with sliced cherry tomatoes and mozzarella and continue to grill / fry for about 5 to 10 minutes, until the cheese is melted and the mushrooms have softened. Move the mushrooms carefully to a plate and finish with fresh basil, salt, and black pepper. Serve warm and enjoy!

Vegetable Skewers w/ Lemon & Basil Oil

notes: if you’re using wooden skewers, remember to soak them beforehand for 30 minutes to prevent them from burning. if you like, you can add other vegetables to the skewers too!

serves 4 as a side

200 g champignon mushrooms
½ zucchini
½ cauliflower
¼ cup lemon & basil oil
+ skewers for grilling

Lemon & Basil Oil
notes: you’ll end up with some extra, but you can use it as a dressing for salads or other grilled food, or store in the fridge for a few days. 

makes about ¾ cup

1 medium bunch of basil, stems removed
1/2 lemon, juiced
¾ cup olive oil
a pinch of salt & black pepper

METHOD:

1. Start by preparing the basil oil. Add the basil, lemon juice, olive oil, salt, and black pepper to a blender and blend until smooth. Pour into a glass jar and set aside.

2. Clean the mushrooms and remove the hard stems. Cut the zucchini and cauliflower into chunks and thread the vegetables alternately onto a few skewers. Grill on medium heat for about 10-15 minutes, until the vegetables have softened and the mushrooms are clearly browned.

3. Take the skewers off the grill and remove the vegetables from the skewers carefully. Add to a big bowl, pour about 1/4-1/3 cup of the basil & lemon oil on top and mix well. Let marinate for at least 15 minutes before serving. Serve and enjoy!

TallennaTallennaTallennaTallennaTallennaTallenna

TallennaTallenna

Spinach, Broccoli & Feta Quiche (GF)

Spinach, Broccoli & Feta Quiche (GF)

this post is sponsored by Asennemedia & Risenta.

There’s always been something magical about summer for me, and I feel like a different person when the warm rays of sunshine hit me for the first time. Maybe it’s because I was born in the summer and live for the sun and sea, but I feel like something lights up in me during these warmer months. Spending time in different cottages and in the archipelago is a must for me, but there’s something special about being in the city too. It takes a bit of extra when you don’t have a yard or a balcony, but I’ve got my own ways to enjoy the outdoors. When it’s nice out, I pack my lunch and have a solo picnic, or I take my laptop with me and work in the park / on the shared yard of our apartment building / at a cafe terrace. And yes, it’s hard to see your laptop screen and sometimes it gets way too hot, but at least I get to be outside! On warm nights, we also like to eat our dinner outside so we just pack some food in a basket and enjoy it nearby in the park or on the beach. Last weekend we took our grill, a bunch of friends, and a lot of food with us, but usually things are quite simple. And in the summertime I really love a savory baked good, like this spinach, broccoli and feta quiche.

Spinach, Broccoli & Feta Quiche (GF) | tuulia blog Gluteeniton kasvispiirakka Spinach, Broccoli & Feta Quiche (GF) | tuulia blog

A quiche is something we usually make on a Sunday night and have been making it for years, but somehow I haven’t got around sharing a recipe before. Maybe it’s because I never make the same thing twice and mostly use leftovers, but there are a few things I’ve learned while making it multiple times: a good gluten-free crust needs a combination of a few different flours, there’s never enough fillings, and instead of using cream, go for a mixture of plant-based milk and eggs. I love using all sorts of veggies, but my staples are spinach, broccoli, zucchini, and cherry tomatoes. This time I used spinach and broccoli, and as feta cheese is my summer weakness, I added it on top before baking. I think quiche is great as a light dinner, or as a main when served with a good salad, and we eat it for breakfast and as an afternoon snack too. I usually don’t even bother to warm up my piece, but just enjoy it as it is :)

I’ve been making a few recipes for Risenta during this year and I got a bunch of gluten-free flours for this post. As I mentioned, I think a good crust needs a mixture of flours, so I used rice, almond, and teff flour for this recipe. Rice and almond flour are great in all sorts of baked goods but I really like teff in savory recipes, as it’s more of a wholegrain flour and brings some great flavor to the dough. Buckwheat is another favorite of mine and you can use it instead of the almond flour, if you wish to make a nut-free version.

Wishing you all lots of delicious moments in your summer kitchen! Stay well, friends!

Spinach, Broccoli & Feta Quiche (GF) | tuulia blog Spinach, Broccoli & Feta Quiche (GF) | tuulia blog Spinach, Broccoli & Feta Quiche (GF) | tuulia blog


Spinach, Broccoli & Feta Quiche (GF)

notes: I love using all kinds of vegetables, so feel free to use your favorites.

dish measurements: 31 x 20 cm / 12 x 8 inches

Crust:
1/2 cup almond flour
1/2 cup rice flour
1/2 cup teff flour
2 tbsp potato flour
a pinch of salt
5 tbsp melted coconut oil (or olive oil / butter)
2/3 cup cold water

Filling:
1 broccoli
70 g baby spinach, rinsed
150 g sheep or goat feta cheese
3 organic eggs
2 cups plant-based milk (I used oat milk)
1 tsp dried thyme
salt & black pepper

METHOD:

1. Preheat the oven to 400 F / 200 C degrees. In a large bowl, measure the flour, add salt, and mix well. Add the oil and water in a few batches while stirring. The dough should be slightly sticky, but easy to handle. Form a ball out of the dough and place the bowl to the fridge for a moment.

2. Cut the broccoli into small pieces and boil or steam for 2 to 3 minutes, so that it remains crunchy. Break the eggs in a bowl, add milk, and mix well. Season with thyme, salt and pepper (I think the pie needs a generous sprinkle of salt).

3. Cover the baking dish with baking paper or spread some oil to the bottom and to the sides of the dish. Take the dough from the refrigerator and press it to the bottom and to the edges of the dish. Fill the pie with spinach and broccoli. Pour over the egg and milk mixture and top with the feta cheese. Bake for 50 to 60 minutes, until the pie has gotten some nice color. If you wish to have some color on top, turn the oven to grill for the last 5 minutes. Let cool for a moment before serving. Serve as it is, or with a side salad, and enjoy!

TallennaTallennaTallennaTallenna

TallennaTallenna

TallennaTallenna

My Free E-Book: Good morning by Tuulia

My Free E-Book: Good morning by Tuulia

If you’ve been reading my blog for a while, you’ve probably figured out that I really love breakfast. Breakfast is, and probably always will be, the meal that I find most inspiring to make and also, the most important meal of the day, at least for me. When I got interested in health and nutrition, breakfast was my sacred time to experiment with new ingredients and different cooking methods. First I added some greens to my morning smoothies, then tried raw porridges instead of cooked ones, experimented with all sorts of pancakes, and became a fan of toppings. I still like to vary my breakfast a lot depending on the season, my cravings., and the day of the week. I love making big breakfasts on the weekend, and something a bit quicker on the weekdays, but I never skip breakfast because the consequences of that are never good :)

So for the love of breakfast, I have made an e-book for you guys, and it’s totally free! I’ve been giving out a small breakfast e-book as a welcome gift to my mailing list for a couple years, but I felt like the e-book needed some updating, so I added a bunch of new recipes and made it a lot more delicious. Good morning by Tuulia offers 18 recipes for sweet and savory breakfasts and they’re all free from gluten, dairy, and refined sugar – and most of them are vegan too! For example, these tasty dishes are included in the e-book…

Savory Tofu Scramble with Avo Toast + My FREE e-book! | tuulia blog

Savory Tofu Scramble w/ Avocado Toast & Green Juice

Sweet Potato Pancakes w/ Berries & Coconut Cream + my FREE e-book! | tuulia blog

Sweet Potato Pancakes w/ Berries & Coconut Cream

Power Smoothie Bowl w/ Chia + my FREE e-book! | tuulia blog

Power Smoothie Bowl w/ Chia

Simple Veggie Patties w/ Avocado & Feta Cheese + my FREE e-book! | tuulia blog

Simple Veggie Patties w/ Avocado & Feta Cheese

So if you’re in need of some breakfast inspiration, just click HERE and download your own copy straight away! You’ll also find the links to the e-book on my sidebar and on the bottom of the page. After downloading the book you’ll join my mailing list, but you can easily opt out anytime you like. And for those of you who already are on my mailing list, just check your last e-mail and you’ll find your copy of the e-book in there!

I really hope you enjoy the recipes and find the e-book inspiring! I always love hearing your feedback and find it so great to see you making my recipes. Thank you for your continuing support and I hope you’ll find something to savour from my favorite morning meals. xx

Good morning by Tuulia | a free e-book with 18 delicious breakfast recipes!

Get your copy by clicking the picture!

Smoothie Sundays: Tropical Greens Smoothie w/ Lemon Balm & Mint | tuulia blog

Smoothie Sundays: Tropical Greens

Smoothie Sundays is back! It’s been a bit of a slow start to my smoothie series but I’m hoping to make up for it with this greenylicious drink I’ve got you. I’ve been needing all the extra energizers + refreshers lately, as some sort of spring exhaustion got me this past week. I feel like I’ve been mainly thinking about chocolate or naps, and literally had to force myself out of the house to eat / work out / do stuff. But with the help of some green drinks, that chocolate, and lots of naps, I feel like myself again and so ready for the summer. And as I was sipping this green goodness, I thought some of you might be in need of some Tropical Greens too! If you need other products to fuel your workout days, you can try well-known supplements like sarms uk.

Smoothie Sundays: Tropical Greens Smoothie w/ Lemon Balm & Mint | tuulia blog

Even though I don’t always end up making them, I think green smoothies are the bomb when you’re in need of something fresh and nourishing. In the summertime I want to have my smoothies very cold and super thick, like a milkshake. My magic ingredient to a really fresh green smoothie is frozen pineapple, which makes the smoothie a bit tropical, and along with the other frozen ingredients, veeeery cold, a.k.a. just the way I like it. We don’t have frozen pineapple chunks in the stores here in Finland, so whenever I’ve got a ripe pineapple I just chop it into small pieces and freeze in ziploc bags. That way it’s super easy to add some pineapple to any smoothie or drink I’m making!

I added some fresh mint and lemon balm to the smoothie but if you feel like making an even greener drink, you could add some dried nettle, wheatgrass powder or spirulina. My favorite add is the wheatgrass powder and it works especially well after a long night out, when you’re in need of some extra nourishment :)

Pssst. You’ll find more smoothies here!

Smoothie Sundays: Tropical Greens Smoothie w/ Lemon Balm & Mint | tuulia blog


Tropical Greens Smoothie w/ Lemon Balm & Mint

notes: I don’t usually really measure my ingredients so this is not a strict recipe. you can always add some more fruit / spinach / herbs to make it delicious for you :)

serves two

1 banana
3/4 cup frozen mango chunks
3/4 cup frozen pineapple chunks
a handful of (frozen) spinach
a few mint leaves
a few lemon balm leaves
1/4 cup coconut milk + 1/2 cup water

METHOD:

Chop the banana to a blender. Add all other ingredients and blend until smooth. Add a bit of liquid, if needed. Pour into glasses, serve, and enjoy!

Matcha Overnight Oats

Matcha Overnight Oats

When most of my friends started to drink coffee in junior high / high school, I never got into the habit. I don’t really like the taste of coffee (but the smell is so good!), so I’ve slowly become a rather passionate tea drinker. I’ve known to drink and buy lots of tea, and we usually have a pretty extent variety of different flavors at home. I love green tea (like, really love it), but in the evenings I go for herbal teas like chamomile, or make a ‘potion’ out of chaga or reishi. A couple years ago I found matcha and fell for it instantly. I love the steady buzz it gives me and finally I was able to order a latte at a cafe, yay! I make my own matcha lattes with both water and plant milk and always add a bit of vanilla. Sometimes I add a bit of coconut butter too and blend it in my blender, so that the latte becomes very frothy. If I’m looking for a sweeter drink, I add a fresh date (to the blended version), or just a dollop of honey. In the summertime I’m all about iced matcha lattes, but before I get too much into that, I wanna tell you about this new love of mine, a.k.a. matcha overnight oats! In fact, eating such actually has positive effects as stated in articles like the 3 Benefits to Eating More Porridge Oats.

Matcha Overnight Oats (GF + V) | tuulia blog

This recipe is pretty much your basic overnight oats recipe (+ the matcha!) but I sweeten the porridge with a mashed banana. I love adding banana to all of my porridges and besides slicing it on top, it works well as a part of the ‘base’ too. And it’s a nice way to replace your basic sweeteners :) While sipping on this goodness, you can incorporate games like 벳무브 to boost the relaxation feels.

Besides rambling about my love for matcha, I thought I’d share a few great links that I’ve found inspiring lately! A few years back I used to share this kind of stuff monthly but then gave up on the habit, so this is my way of bringing that tradition back in a relaxed, not-regular way, which seems to be my way of working. Enjoy the porridge + the links, friends!


I’ve been daydreaming about a vegan + gluten-free summer cake for a while now and this one looks so gorgeous, that I need to come up with a recipe soon!

The 10 things to remember this week. And every week.

Do you work from home? Read this and you’ll be laughing out loud tears in your eyes, like I did. And then I read it again. (And now I’m really into New Yorker too!)

These chickpea cookies with dark chocolate, YES PLEASE!

If you live in Helsinki, I strongly recommend eating in MAT at Iso Roobertinkatu. I go there way too much and love their vegan patties, and that gluten-free buckwheat bread!

I also love being out in the sun and sunbathing, but I try to be careful with my skin. My favorite sun screen has been the Puhdas+ sun screen but now I’m trying out a spray from Algamaris, which smells wonderful and spreads really well (they’re both natural cosmetics). So with these buddies, I’m all ready for a hot and steamy summer – hope you are too!

Matcha Overnight Oats (GF + V) | tuulia blog Matcha Overnight Oats (GF + V) | tuulia blog


Matcha Overnight Oats

notes: as I mentioned above, I use mashed banana to sweeten the porridge and it makes the porridge creamier too. if you’re not into bananas, you can use 1 to 2 teaspoons of your desired sweetener. 

serves one

1/2 cup gluten-free rolled oats
1 tbsp chia seeds
3/4 unsweetened almond milk (or other plant-based milk)
1/2 ripe banana
1/2 – 1 tsp matcha powder (depending on how strong you like it)
a pinch of vanilla powder
fresh berries, for serving

METHOD:

1. Measure the rolled oats, chia seeds, and almond milk in a bowl and mix well. Place the bowl in the fridge for a few hours, or overnight.

2. Slice the banana into small pieces and smash with a fork. Add the banana mash, matcha powder, and vanilla to the porridge and mix well. Add a little milk if the porridge feels too thick. Top the porridge with berries and enjoy!

Banana Split Deluxe + N’Ice Cream News!

Banana Split Deluxe + N’Ice Cream News!

You guys probably know that I love ice cream (as I even made a book about them!) and I know that many of you have a passion for frozen treats as well. So I’ve got great news for all you ice cream lovers out there! Today is the day we’re publishing the e-book version of our Finnish N’Ice Cream Book and it has 10 NEW RECIPES! I know I’m thrilled and I hope you are too.

Hyvän olon jäätelökirja E-KIRJA

It’s been an exciting year after our book with Vanelja came out and since it’s pub date, the N’Ice Cream Book has been published in 6 countries, which to be honest, feels pretty unbelievable. So to celebrate all of this, the upcoming summer, and our love for ice creams, we wanted to make this e-book version a bit more luxurious and ended up adding some of our new favorite recipes. All the recipes are free from gluten, dairy and refined sugars, and by replacing honey with another sweetener, they’re vegan too. If homemade ice creams are a new thing for you, I strongly recommend hopping on board right now. After making and eating plant-based ice creams for a few years, I can tell you that these are the good stuff. And there are so many options to make! Chocolate-loaded creamy delights, quick banana ice creams that only require a blender, fruit pops, or even ice cream cakes are easy to prepare in the comfort of your own kitchen. And when you get yourself into the world of homemade ice cream, things really won’t be the same. Regular ice cream begins to taste pretty boring (okay not Italian gelato) and plant-based options will become more tempting. That’s at least what happened to me, and to my husband after trying out aaallll my creations. But we’re not complaining, as this world of plant-based ice creams is just so good. Enough of me babbling about my love for ice cream, let’s get to these treats I’ve got you!

Homemade Banana Split w/ Coconut & Date Ice Cream (VEGAN) | tuulia blog

There’s only one appropriate way to celebrate the launch of our e-book, and it’s with more ice cream (clever, right?). Enter, Banana Split Deluxe with homemade Date & Coconut Ice Cream, fresh berries, shaved chocolate, and almond flakes. YESSS. The ice cream is based on cashews and coconut milk and it’s great by itself, but I very, very much love it with all the toppings. And because two is better than one,  the other festive recipe is over at Vanelja and Virpi made a very divine Luxury Chocolate Nice Cream. I strongly recommend making both and enjoying life with a big bowl of ice cream. Just because we can.

And if you’re looking for more ice cream inspiration, go ahead and get yourself our e-book with over 90 delicious recipes. The new bonus recipes are available only in this e-book and currently it’s in Finnish only. (The English version of our book can be found here.) The e-book is only 8,90 euros and you can get it from our webshop HERE.

And lastly, a huge thank you for all of you out there who have bought our book (or written about it!). It’s been truly heartwarming to see so many people find joy in our recipes. Thank you from the bottom of my heart <3

Homemade Banana Split w/ Coconut & Date Ice Cream (VEGAN) | tuulia blogHomemade Banana Split w/ Coconut & Date Ice Cream (VEGAN) | tuulia blog


Vegan Banana Split Deluxe

notes: you can make this with other ice cream flavors too and if you’re not up for waiting, I recommend this Instant Vanilla Ice Cream made with bananas. nuts, granola, fruits, and chocolate sauce would be great toppings too, so just pick the ones you like and go wild! :)

makes one huge or two smaller servings

1 banana
2-3 scoops Date & Coconut Ice Cream (recipe below)
fresh berries
shaved raw chocolate (or dark chocolate)
almond flakes

METHOD:

Slice the banana in half lengthwise and place on a plate. Scoop a few ice cream balls on top and decorate with berries, shaved chocolate, and almond flakes. Serve, and enjoy!

Date & Coconut Ice Cream

notes: I recommend using dried dates instead of fresh ones, as you want to have some structure in the fruit. I prefer the ice cream only moderately sweet, as the dates bring sweetness too. you can always add more sweetener if you think the ice cream mixture needs it. 

1 cup cashews
1 (400 ml / 14-ounce) can full-fat coconut milk
2-3 tbsp organic honey (or maple syrup to keep it vegan)
1 tsp vanilla powder
2/3 cup dried dates, chopped into small pieces
½ cup toasted coconut flakes

METHOD:

1. Place the cashews in a large bowl, add plenty of water and soak overnight or for at least 4-6 hours before making the ice cream.

2. Drain and rinse the cashews and add them to a blender. Add coconut milk, honey, and vanilla and blend until smooth. The mixture should be creamy and very smooth. Taste, and add sweetener if needed.

3. Pour the ice cream mixture into the ice cream maker and prepare the ice cream according tot the machine’s instructions. Just before the ice cream is done, add the chopped dates and toasted coconut. Serve the ice cream immediately or move the freezer-safe container and place in the freezer for a few hours. Let the ice cream thaw for about 15 minutes before serving.

Preparing the ice cream without an ice cream maker:
Pour the ice cream mixture into a freeze-safe container and freeze for about 3 hours, stirring thoroughly every 30 minutes. When the ice cream is firm enough, scoop into balls, serve and enjoy!

Hyvän olon jäätelökirja e-kirja

GET YOUR COPY HERE

Raw Blueberry Cheesecake

Raw Blueberry Cheesecake

A lot of you are probably really familiar with raw cakes, as they’ve been trending for a few years already. I’ve been making them for years too and posted a couple recipe here on the blog as well. But even if it’s nothing new, I’m taking the risk and sharing this raw blueberry cheesecake with you today, as it literally is the bomb. It turned out super creamy (just how a raw cake is supposed to be) but the flavor is really fresh and totally berrylicious. One piece is enough to satisfy your cake cravings, but the second slice really does the trick. So it really hit all the spots for me, and for my friends too :)

Raw Blueberry Cheesecake | tuulia blogRaw Blueberry Cheesecake | tuulia blog

I originally made this recipe for CocoVi, as I’ve been making recipes for them this whole year (and will be making some more too!). But as it just turned out so good, I knew it needed to be posted here too. So I hope you guys like it as much as I and my hungry pals did!

And just to let you all healthy-treat-lovers know, we’ll be soon publishing an e-book version of our Finnish N’Ice Cream book with some added recipes! I’m super excited about it and will share more info soon. Until then, enjoy the cake and stay well! xx

Raw Blueberry Cheesecake | tuulia blog


Raw Blueberry Cheesecake (vegan & gluten-free)

notes: I added some acai powder to the filling to make this even more berrylicious, but you can leave it out as it’s just a bonus. I recommend tasting the filling as you make it, so you can add more lemon, blueberries, or sweetener, if you feel like it!

8-inch / 20 cm springform cake pan

Crust:
1 1/2 cup walnuts (or pecans / almonds)
1 1/2 tsp ceylon cinnamon
a tiny pinch of salt
6-8 fresh dates, pitted

Filling:
2 cups / 225g cashews (soaked overnight)
1 big lemon, juiced
3/4 cup blueberries (I use wild blueberries)
1/2 cup coconut milk
2/3 cup coconut oil, melted
3-5 tbsp organic honey (or maple syrup)
(2 tbsp acai powder)
1 tsp vanilla powder

Toppings:
blueberries and edible flowers

METHOD:

1. Place the cashews in a big bowl, cover with water and soak overnight or for at least 4 hours before making the cake.

2. Start by preparing the crust. Add walnuts, cinnamon and salt into a blender or a food processor and grind until fine crumble. Cut the dates into smaller pieces and add in couple turns. Blend until you get a sticky dough. Line the bottom of a cake tin with baking paper and press the dough to the bottom of the cake tin. Place it in the freezer while making the filling.

3. Rinse the blender. Drain and rinse the cashews and add them to the blender. Add all other ingredients and blend for a few minutes, until very creamy and smooth. Taste, and add more honey / lemon juice / blueberries, if needed.

4. Take the cake tin from the freezer and pour the filling on top of the crust. Return to the freezer for 4 to 6 hours until the filling has set.

5. When the filling has set, take the cake from the freezer and remove the sides of the cake tin carefully. Decorate with the fresh blueberries and edible flowers and let thaw for 15-20 minutes before serving. The cake will remain good in the fridge for a couple of days, for longer periods, store in the freezer.

TallennaTallenna

Spring Pasta Salad w/ Lemon & Basil (GF)

Spring Pasta Salad w/ Lemon & Basil (GF)

It seems that the weather goddesses are having a hard time deciding whether it should be spring or winter, as it’s been snowing (!!) almost every day during the last week. I, however, have decided that it’s definitely spring and celebrated it by biking around the city with a smoothie in hand (let’s not talk about the fact that my fingers were totally frozen) and by buying the very first syrens of the season. They’re not nearly as pretty as the ones I steal pick up during the summer, but it brings a promise of spring to our place. As we have a new place, again! I’ve lost count on how may times I and we have moved during the last few years and hopefully won’t be doing that again in the future (fingers crossed :)). The most important thing right now is that our current place is really nice, I finally got to unpack all my kitchen stuff, and we’re just a couple minutes away from the sea and a few great parks I love to go during the summer. Yay!

This weekend we’re celebrating May Day, which marks two things for me: it’s the only tradition left from my uni times and we always celebrate with a big group of friends from school, and also, it’s the grand opening for picnic season! I think a lot of us, including me, are always on the lookout for quick and easy picnic recipes so I thought I’d share this favorite of mine: Spring Pasta Salad! I generally love pasta salads especially in the summer because they’re very easy, filling, but also fresh enough to be served with a bunch of other (unhealthier) foods, and maybe a glass of bubbles.

Spring Pasta Salad w/ Lemon & Basil (GF) | tuulia blog

This salad has a lot of my current favorites, such as asparagus, sun-dried tomatoes, and this really nice lemon and basil oil I make in my blender. The parmesan flakes balance out the lemon very nicely and roasting the asparagus on the pan leaves it really crunchy, which is just how I like my asparagus. If you’d like to make a vegan version of this, you can just skip the parmesan or try making a vegan nut-based parmesan cheese. I like to make my pasta salads heavier on the veggie side and leave the vegetables crunchy, so that the salad will look and taste good even after a few hours.

A few of my other picnic favorites include this gluten-free focaccia, savory carrot muffins, and this divine chocolate cake. With a few good dishes, a bottle of something nice (whether it’s juice, kombucha or wine), and a group of friends, I think you can never go wrong :)

Happy spring times, friends! xx


For more inspiration, follow me on Instagram and tag photos of my recipes with #tuuliablog so I can see!


Spring Pasta Salad w/ Lemon & Basil (GF) | tuulia blog


Spring Pasta Salad w/ Lemon & Basil (GF)

notes: I like to use brown rice pasta in this but other gluten-free pastas work well too. if you’d like to add a bit more protein, you could make this with a bean-based pasta! and if the basil pesto seems like too much work (it’s really easy), you can replace it with regular pesto sauce.

serves 4

250 g gluten-free pasta
1 bunch asparagus
½ zucchini
olive oil, for frying
150 g cherry tomatoes
6-8 sun-dried tomatoes
70 g baby spinach
1/2 cup parmesan flakes
lemon basil oil (recipe below)

METHOD:

1. Cook the pasta according to the package instructions. Drain the pasta and add about a tablespoon of olive oil to prevent the pasta from sticking to each other. Let cool.

2. Rinse and peel asparagus, if needed. Remove the hard ends. Cut the asparagus and zucchini into small pieces. Add a splash of olive oil to a frying pan and fry the veggies for a few minutes until they are slightly softened and browned.

3. Cut the cherry tomatoes and sun-dried tomatoes. Combine all ingredients in a large bowl and finish with the parmesan cheese and lemon basil oil. Serve and enjoy!

Lemon Basil Oil

makes about 3/4 cup

1 1/2 cup fresh basil
1/2 lemon, juiced
3/4 cup olive oil
a pinch of salt

METHOD:

Add all ingredients to a blender and blend until smooth. Pour into a jar and store in the fridge.