3 Ingredient Sweet Potato Flatbread

3 Ingredient Sweet Potato Flatbread

3 ingredient Sweet Potato Flatbreads3 ingredient Sweet Potato Flatbreads

I’ve never really had a motto or any specific quote, that I’d repeat to myself through life. Or maybe I decided on something at some point, but forgot about it. However, during the last few months there’s been this one sentence I picked up from Pinterest that keeps making sence to me:

“Do less with more focus.”

For long, I’ve thought that the more I do and the busier I am, the better I do in life and in my work. But nope, it doesn’t work like that. Time after time I learn that doing too many things (at a time) will only lead to catastrophes. To broken dishes, unfinished work tasks and to me not at my best.

So it’s been a bit of a chaos in here for the last few months, as I’ve been learning this working-for-myself lifestyle. When there aren’t that many routines and schedules, you’re not always sure whether it’s a workday or the weekend, what to focus on and what’s enough. It’s not all work-related though. The feeling of chaos comes also from messy closets and cupboards, and from the fact, that I really should see my hairdresser. So now I’m all for an early spring cleaning, pampering myself with some treatments, and simple, fresh and nourishing foods. And also, I’m definitely all for doing only one thing at a time, which makes life so much more enjoyable than the never-ending multitasking.

3 ingredient Sweet Potato Flatbreads

Doing less with more focus applies to my cookings now too and especially to today’s recipe. I’m a big fan of all kinds of flatbreads, that can be made in minutes. If I have a craving for some bread and I don’t have any at hand, I usually make some kind of ‘pan bread’: I add an egg, rolled oats or other flour, a bit of olive oil and salt into a blender and fry it on a pan. The end result is a bit like a pancake, but thicker, and it resembles bread enough to fool my brain.

But in addition to those pan breads, I love flatbreads, as they don’t require that much work than a loaf of bread. Potato and oat flatbreads are really typical Finnish foods and they’re delicious, but my favorite version is made with sweet potato. And this version of mine requires only three main ingredients: sweet potato, egg (or ground flaxseed for a vegan version) and oat flour. I added a bit of salt and baking powder too, but the recipe is super simple. If you have any leftover oven roasted sweet potatoes, go ahead and use them (I do it often) or then just boil/steam the sweet potato. And if you’re up to another experiment, try these with carrot instead of the sweet potato. The carrot version is delicious too.

Eat well and take it easy! xx

3 ingredient Sweet Potato Flatbreads


3-Ingredient Sweet Potato Flatbread

makes 8-10 flatbreads

notes: you can make your own oat flour by grinding rolled oats into fine flour in a blender. I always make a big batch of it so it’s easy to use in all kind of gluten-free baking. 

1 cup mashed sweet potato (about 1/2 sweet potato peeled, boiled/steamed and mashed)
1 organic egg (or 1 tbsp ground flaxseed + 3 tbsp water)
1 1/4 cups gluten-free oat flour + 1/4 cup for baking
1 tsp sea salt
1 tsp baking powder

METHOD:

Preheat the oven to 400°F. In a big bowl, mix the mashed sweet potato with the egg. Add flour, salt and baking powder and mix well. The dough can be a bit sticky, but it should be easy to handle. Add a bit more flour, if needed. Scoop 8-10 balls with a spoon and place on a baking tray covered with parchment paper. With the help of some flour, pat and flatten the dough into thin rounds with your hands. Bake for about 20-25 minutes, until the flatbreads are slightly golden brown. Serve while warm and enjoy!

Sweet Potato, Carrot & Lentil Stew

Sweet Potato, Carrot & Lentil Stew

Sweet Potato, Carrot & Lentil Stew Sweet Potato, Carrot & Lentil Stew

Reading food blogs and magazines pretty much always gives me this huge burst of inspiration: “Oh yum, that sounds soooo good.” “I’ve got try that one!” “My weekend treat, it’s this one here.” And then it’s the evening, time to make dinner, you’re super hungry as you walk to the fridge, and have no idea what to make.

I’ve been there, we’ve been there, even though a part of my work is to create recipes!

But here’s one solution, that’s a staple in our kitchen: Sweet Potato, Carrot & Lentil Stew, that’s delicious, easy, healthy and very affordable. A.k.a the perfect weeknight meal.

I’ve been making this recipe for years, as the younger me in the beginning of my studies appreciated partying and other things much more than being home and cooking for myself. So all one-pot vegetarian meals that could last for days were my favorites. And actually, they still are, even though my weeknights are a looot more chill nowadays.

Sweet Potato, Carrot & Lentil Stew

Even though I’ve made this dozens of times, it hasn’t had an actual name, until now. You see, we’ve been calling it ‘the lava’, as my boyfriend started to call it after burning his tongue while eating it. And true, it’s always so burning hot! But anyhow, besides having a name now (it’s a stew!), this is a rather perfect recipe for this time of the year. I’m still craving for something warm and spicy but not too heavy, as I can feel the spring in the air (it’s somewhere behind the snow, trust me). So veggie stews are a great option, as they’re filling yet light and can be savored as it is or with some brown rice, which makes the meal a bit more nourishing. And you can even turn this into a soup by adding some more water and/or coconut milk!

If you’re making this for yourself and think you might get bored of it on the third or on the fourth day, just freeze it in portions and you’ll have meals ready for those days when feeling tired + hungry. You’ll be thanking yourself later, trust me. So feel good, eat well and stay cozy friends! x

Sweet Potato, Carrot & Lentil Stew Sweet Potato, Carrot & Lentil Stew

Sweet Potato, Carrot & Lentil Stew

notes: this is the base recipe for my stew, but I often add some other veggies or beans too. for example cauliflower, broccoli, zucchini, eggplant and any other beans work well. and the spices can be altered too, just use the ones you like and have at hand!

serves 4-6

1 onion
2 garlic cloves
1 sweet potato
3 big carrots
1 tbsp coconut oil
1 1/2 cups red lentils
2 cups (500 g) organic crushed tomatoes
2 cups water
1/2 tsp paprika powder
1/2 tsp ground chillies
1/2 tsp cumin
1 tsp turmeric
1 cup coconut milk
salt & black pepper
+ greek yogurt / coconut milk & fresh cilantro for serving

METHOD:

1. Peel and chop the onion and garlic. Peel the sweet potato and carrots and cut into small pieces. Heat the coconut oil in a large saucepan or pot. Sauté the onions for a couple minutes until they soften slightly. Add the chopped sweet potato and carrot and fry for another couple of minutes.

2. Add lentils, tomato puree, water and spices to the pan and mix well. Bring to a boil, lower the temperature and let simmer under a lid for about 15 minutes, stirring occasionally for a couple of times. Add the coconut milk (and more water, if necessary) and let simmer for about 5 minutes, until the vegetables are soft. Add salt and pepper (I like to add them quite generously) and any other spices, if desired. Serve for example with brown rice, a spoonful of greek yogurt and lots of fresh cilantro, and enjoy!

Luxury Oatmeal w/ Banana Cashew Milk

Luxury Oatmeal w/ Banana Cashew Milk

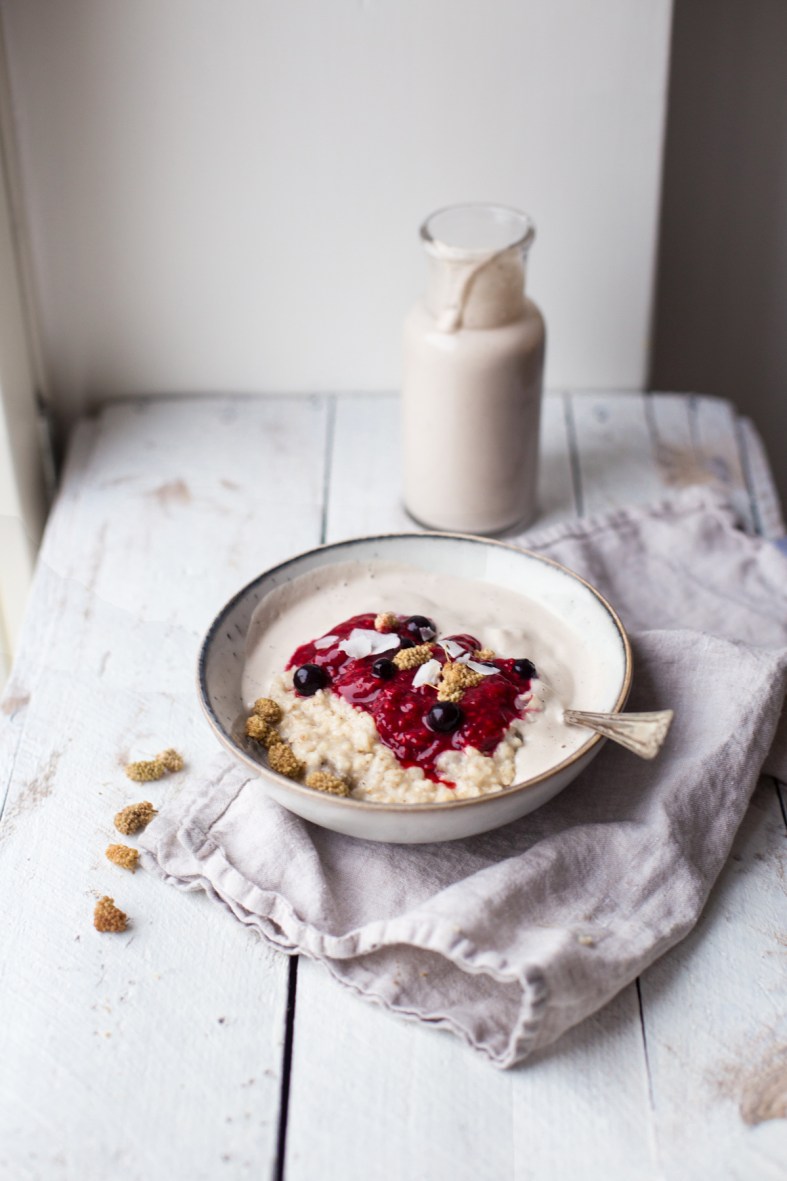
luxury oatmeal with banana cashew milk & berries (gf + v)

luxury oatmeal with banana cashew milk & berries (gf + v)

Whenever I have a break from this blog, returning here and sharing a story and a recipe becomes a lot more difficult. Suddenly everything I write feels a bit stupid or I feel like I should have the most spectacular recipe to share. And if I don’t have that, I think it’s better not to share at all. But trying to be perfect and do everything perfectly is rather exhausting, and  often totally unnecessary, as in so many cases things created by mistake, without thinking too much and in a relaxed state of mind are a lot more interesting. So here I am, saying bye bye to all the pressure I keep gathering up, and instead I’m welcoming more free-spirited creating to my life.

Easier said than done, I know. But to fulfill these words I just wrote, I came here with a recipe for an oatmeal. Ha! You read correctly. Recipe for an oatmeal! Pressures: gone for now.

But let me explain. A lot of people see oatmeal as something utterly boring and sad, but as a long-time porridge fanatic, I’ve always believed in its magical possibilities. For me, oatmeal is comfort food at its best: warm, creamy, and super easy to prepare. And there are so many ways to do it from sweet to savoury. However, lately I’ve been coming back to this one combination of flavors and decided to start calling it ‘the luxury oatmeal’, as it feels a bit special and I’ve been making it whenever I felt I needed something a bit fancier. And hey, it was time oatmeal became luxurious!

If you would like to get creative when eating oatmeal I will leave here these 5 Ways to Eat Porridge Oats in the Morning that will make your breakfast a whole experience.

luxury oatmeal with banana cashew milk & berries (gf + v) luxury oatmeal with banana cashew milk & berries (gf + v)

So what makes a luxury porridge? Cooking it in a way that it’s thick and creamy. Hiding sweet, caramel-like mulberries in it, and  pairing it with this fabulous banana cashew milk, that takes the thing to whole other level. And oh yes, berries. Always berries.

Some of my other favorites for making oatmeal extra delicious:

– Caramelized bananas. Cut the bananas in half lengthwise, sprinkle with some cinnamon and bake in 400 F / 200 C for about 15 minutes.

– Oven roasted pears. Cut the pears into pieces, sprinkle with some cinnamon and bake in 400 F / 200 C for about 10 minutes.

– A generous spoonful of your favorite nut butter, either mixed to the oatmeal or as a topping.

– 1-2 tablespoons (raw) cacao powder = chocolate porridge! Add a spoonful of coconut butter and top and you’re in heaven.

– Granola or a mix of different nuts and dried fruits.

– Ice cream (!) The ultimate choice for a high-vibe luxury oatmeal.

So the goal from now on with cooking, writing, and actually anything that involves creating: give up perfection and add more luxury into life. Start with the porridge and go from there.

Sparkles into your everyday life, friends! And hey – if you’ve got any kick-ass tips for special oatmeals, please feel free to share them below! ♡

luxury oatmeal with banana cashew milk & berries (gf + v)

Luxury Oatmeal

serves two

1 cup (gluten-free) rolled oats
1/4 cup dried mulberries (or raisins or other dried fruit, cut into small pieces)
1 3/4 cup water
1 cup oat milk (or other plant-based milk)
1/2 tsp vanilla powder
1/2 tsp salt

METHOD:

Add oats, mulberries, water and oat milk into a small pan. Bring to boil, cover with a lid and turn the heat off. Let the porridge steep for 5-10 minutes. Add vanilla and salt and mix well. Serve with the banana cashew milk and some berries, if you like, and enjoy!

Banana Cashew MIlk

1 frozen banana
1/2 cup cashews
1-2 fresh dates, pitted
1/2 tsp vanilla powder
3/4 cup water

METHOD:

On the night before:

Cut the banana into a box or plastic bag and place in the freezer. Place the cashews in a bowl, add water and leave to soak overnight.

In the morning:

Rinse and drain the cashews and add them into a blender. Add all other ingredients and blend until creamy and smooth. Taste, and add sweetener or vanilla, if necessary. Store in an airtight jar in the fridge, if there are any leftovers.

Oven baked Sweet Potato Chips w/ Cashew Tahini Dip | Healthy Snacking

Oven baked Sweet Potato Chips w/ Cashew Tahini Dip | Healthy Snacking

sweet potato chips w/ cashew tahini dip

Well, hello 2016 and all you guys!

I was planning on starting this year with a bang. You know, with organizing all my stuff, go back to my dance studio and start taking on lessons again, and do things x, y and z. But here I am, lying on the sofa, battling a cold and haven’t done a single thing of the list above. But despite the sore throat and a tired body, I’m all smiles for this year that has just begun. The last months of the year tend to be tough here in Northern Europe and last year I once again started to feel the darkness weighing me down, so I’ll gladly welcome all new energies, ideas and passions this New Year brings us.

I’ve never been into New Year’s resolutions, so instead of those, I made a few wishes for myself, which I hope to fulfill this year: 1) Have more free time. Actual ‘free’ time. No laptop, no phone. Do things that bring you joy. 2) Invite friends over more often and don’t stress about it. Be the carefree hostess you dream of being. 3) Save up money and travel to somewhere warm with crystal blue waters and white sand.

And oh yeah, one more: 4) Remember to plan and celebrate your wedding. And have fun!

In addition to these few things, I really want to spend more time creating new recipes, that I can share here and maybe inspire you to try them out too. As that’s what makes me really happy. So to get the new recipes rolling, let’s start with these oven baked Sweet Potato Chips served with a Cashew Tahini Sauce!

sweet potato chips w/ cashew tahini dip sweet potato chips w/ cashew tahini dip

One of the cool things happening this year is my collaboration with Urtekram. I’ve been using their products for years, so I was super pleased when they asked me to create a few recipes for them. The star of this first recipe is their organic cold-pressed coconut oil, that’s a top-quality product and has a really fresh and mild taste, which makes it perfect for both baking and cooking. Coconut oil is a staple in our kitchen and I use it in many different things, but I especially like to use it when frying something on the pan or baking goodies in the oven, as it can handle high temperatures well, unlike other plant-based oils. So it’s a perfect match for these sweet potato chips that are baked in the oven.

I’ve never been really into chips but I have a serious addiction to all kinds of dips. And naturally, you always need to something to dip with. Lately I’ve been making sweet potato fries a lot, but this time I wanted to try and make chips from my favorite winter root vegetable. And I’m happy to tell you that I nailed them! These chips turned out perfectly crispy, so that you’ll get an inappropriate amount of dip on top of the chip, if you’re anything like me. Just try to cut the sweet potatoes into very thin slices and keep an eye on the oven, and you’ll be having plenty of crunchy chips in no time which would be perfect when you play games like 해외배팅사이트.

And now that I came up with crunchy snack, I obviously had to come up with a new dip to make this healthy snacking a bit more luxurious. So I whipped up a Cashew Tahini Dip, that is super creamy and a great pair for the sweet potato chips, or for anything, that needs a creamy tahini-filled sauce. And if you like your dips a bit more spicy, add some chili powder, smoked paprika or any of your favorite herbs to make the dip the kind you’re in the mood of.

Happy ‘n healthy snack times, friends! ♡

sweet potato chips w/ cashew tahini dip

Oven baked Sweet Potato Chips

makes 4 baking sheets

2 medium sweet potatoes
2-3 tablespoons extra virgin coconut oil, melted
1/2 teaspoon ceylon cinnamon

METHOD:

1. Preheat oven to 175°C / 350°F. Peel the sweet potatoes and slice them really thin with a mandolin or a knife / cheese cutter. The thinner the slices, the crispier the chips will be. Add the slices to a big bowl and mix with coconut oil and cinnamon. Spread the slices onto a baking sheet covered with parchment paper.

2. Bake for 15 minutes, take out from the oven and flip. Return to the oven and bake for another 10 to 15 minutes, until the edges are golden brown, crisp and curled up. Be careful not to burn especially the smaller chips. Let cool and serve with the cashew tahini dip.

Cashew Tahini Dip

2/3 cup / 200 ml (soaked) cashew nuts
juice from one big lemon
3 tablespoons tahini
2 tablespoons nutritional yeast
1 cup / 250 ml water
sea salt & black pepper to taste

METHOD:

1. Soak the cashews for 4 hours or overnight. Rinse and drain.

2. Squeeze the lemon juice. Add all ingredients into a blender and blend until smooth. Add more water if you prefer the dip runnier. Taste, and add more spices if desired. Store the dip in an airtight glass jar in the fridge.

Coconut Rice Pudding w/ Raspberries, Persimmon & Pomegranate

Coconut Rice Pudding w/ Raspberries, Persimmon & Pomegranate

Coconut Rice Pudding | A Christmas Dessert

Before I start with any food-related talk, let’s pause for a moment and take a breath. A deep inhale. And an exhale. And another. And maybe a third one too.

Phew what a year.

2015 has been good. And a bit crazy. There has been a lot of changes and new challenges and they sure have kept me busy. But in a good way, which I’m thankful for. This autumn has been special for two reasons. One: I got engaged! Even though it’s now been over a month since my boyfriend proposed to me, it’s still so exciting and we are so so happy. Two: I’ve got to work with two amazing and huge projects, which have taken most of my time and energy. But it’s been super fun and soon I’ll tell you all about it, which is really exciting too!

But now: the last recipe of this year!

Coconut Rice Pudding | A Christmas Dessert

Rice porridge is a true classic dish here in Finland, especially in the wintertime around Christmas. In the traditional version, the rice is cooked with whole milk and the porridge is served with a prune soup or just some cinnamon and sugar, or even butter. Since cutting back on dairy products, I’ve started to cook my rice porridge with coconut milk, which makes it really creamy, and a bit more special.

Besides having warm memories of eating rice porridge on Christmas morning, I confess savoring the leftover cold porridge as a snack with a side of fruit and nuts. So to make this habit of mine a bit more glamorous, I wanted to make the leftovers I had into a real recipe, that could be served as an easy make-ahead dessert or as a nice alternative to the usual porridge things at the breakfast table. Enter: Coconut Rice Pudding!

This Coconut Rice Pudding is super simple and really quick to make. All you really need is some cooked rice porridge or cooked risotto rice, which is the key to this dessert. So make a double portion when you’re cooking rice and you’ve got your dessert covered! To make this one extra delicious, I topped these with crushed gingerbread cookies for a Christmas feeling but any other cookies or even some crushed chocolate would be great too. Use your imagination in the toppings and have a peaceful moment with this creamy goodness.

Happy holidays friends! ♡

Coconut Rice Pudding | A Christmas Dessert


Coconut Rice Pudding w/ Raspberries, Persimmon & Pomegranate

serves 4

2 cups cooked, cold rice porridge
1 cup full-fat coconut milk
1/2 teaspoon vanilla powder (or the seeds from one vanilla pod)
1 teaspoon ground cardamom
2-3 tablespoons organic local honey (or maple or coconut syrup)
2 tablespoons almond butter (or other nut butter), optional

2 cups thawed raspberries
1 persimmon
seeds from 1/2 pomegranate
a couple gluten free gingerbead cookies

METHOD:

1. Pour the coconut milk in a cup and stir in vanilla and cardamom. In a big bowl, mix the coconut milk with the rice porridge. Add honey and almond butter and mix well with a spoon. Taste, and add some sweetener or spices, if desired.

2. Mash the raspberries with a fork. Wash the persimmon and chop into thin slices.

3. Layer the rice porridge and the raspberries into serving bowls. Top with persimmon slices, pomegranate seeds and some crushed gingerbread cookies, serve, and enjoy!

Homemade Tea Blends | For Christmas

Homemade Tea Blends | For Christmas

Homemade Herbal Tea Blends

I’m slowly starting to realize that Christmas is only two weeks away. I love our big family dinner and all the traditions we have, but what I’m really waiting for is some offline time. As there’s no clear line between my work and free time, I sometimes find it difficult to take time off and just chill without feeling of ‘I should’ do something or accomplish this and that. So this Christmas I’m really trying to have a few days off, ditch my laptop and iPad and focus on reading books, cooking and doing things, that I don’t need to do, but I want to.

But before taking off and abandoning this little online space for a while, let’s talk about Christmas presents!

Homemade Herbal Tea Blends Homemade Herbal Tea Blends

I’m a huge fan of presents (well, who isn’t?). It’s always fun to receive them, but also buying them, planning what I want to give(like those delicate gifts for the woman who wants nothing) and making my own gifts give me so much enjoyment. Sometimes I like to buy new things, if I know they’re really needed and wanted, or if it means supporting a local designer I like.

But I’m also always rooting for diy gifts, as they’re personal, usually a lot of fun to do, and you can easily make a big batch and give the same thing for lots of people. And it’s ecological too, when you use for example recycled glass jars to store the gifts. So it’s kind of the perfect win-win situation. As for the young ones, giving them with interesting gifts like the little clubhouse diy wood playhouse may be ideal.

In recent years I’ve given for example homemade granola, diy natural moisturizing cream and flavored oils for friends and family but this year I wanted to try something new and a bit more special. Enter: homemade tea blends!

Homemade Herbal Tea Blends Homemade Herbal Tea Blends

I drink a lot of tea (seriously. a lot.) and I buy it often both to our home and as a gift to others. Making my own tea blends has been in my mind for a while already but now that Christmas is coming closer, I thought it’s the perfect time to let my inner hippie out. So I made three different kinds of blends: one is based on rooibos tea, one has only herbs and one is a simple green tea blend. It was super fun to come up with these blends and we even made these super simple labels to go with them. So just hunt down some of your favorite teas, herbs and spices, go crazy with them and treat yourself and your close ones with an unique gift. And have fun with you gift making! ♡

Homemade Herbal Tea Blends

Tips for making homemade tea blends:

– Choose your base. Unflavoured leaf teas are easy: green, white and rooibos all work well. Also try hibiscus, chamomile or licorice root, which all have great health benefits and and a sophisticated taste.

– Bring flavor with dried herbs and spices. Try for example vanilla and cinnamon sticks, cardamom, fennel, anise, coriander, lavender, rose petals, dried berries, coconut and/or mint.

– Make sure that you’re using only edible herbs and spices.

– Choose organic teas, spices and herbs if possible. By using organic ingredients you can be sure of having pure and high quality blends.

– Unflavored leaf teas can be found in tea shops and health stores and organic herbs and spices are most often found on farmer’s markets, spice shops and health stores.

– Store the tea in an airtight glass jar or in strong paper bags and decorate with homemade labels if you like!

Homemade Tea blends
Homemade Tea Blends

“Gentle breeze”

1 part unflavored rooibos tea
1 part hibiscus
1/6 part vanilla pod

Cut the vanilla pod(s) into small pieces. Mix all ingredients together and store in an airtight glass air. Brew the tea for 4-5 minutes before serving.

“After dinner”

1 part fennel seeds
1 part coriander seeds
1 part anise seeds
1 part whole cardamom seeds

Mix all ingredients together and store in an airtight glass air. Brew the tea for 5-7 minutes before serving.

“Green spirit”

1 part unflavored green tea
1/4 part dried basil
1/4 part dried black currants (or other dried berries)

Mix all ingredients together and store in an airtight glass air. Brew the tea for 2-3 minutes before serving.

Raw Vegan Gingerbread Cake

Raw Vegan Gingerbread Cake

raw vegan gingerbread cake

And here I am again with Christmassy things. I think I’m able to remain my cool this year, but that doesn’t mean I haven’t been thinking about all the food I’d like to make…and apparently I’ve been thinking a lot about things with gingerbread spices. Instead of the tradition of baking my own gingerbread cookies, I decided to skip them (so much work!) and satisfy my cravings with this cake.

I happened to develop this recipe a few weekends ago, as we were visiting my family and I wanted to make a dessert for our Sunday dinner. So I made this cake and it turned out yum. I quickly realized that this was the kind of thing I shouldn’t just keep to myself (as I’ll forget in a week and then be pissed), as this cake really needs its 15 seconds of fame.

So friends, say bye to all that holiday stress – here’s a cake that will get you through all the parties, dinners and other gatherings!

raw vegan gingerbread cake raw vegan gingerbread cake

If you’ve been making raw cakes before, you’ll whip this up in no time. If you’re making a raw cake for the first time, no problem, you’ll probably just be surprised how easy it actually is.

The heart of this cake are the gingerbread spices, which make it a great Christmas dessert. I used ceylon cinnamon, ground cardamom, ginger and clove, but you can also use a store bought spice mix if you don’t have those at hand.

And then a small but remarkable tip for all the comfort-loving bakers like me: you can prepare the cake a few days in advance and then just store it in the freezer until ready to be served. So if you’ve promised to bring a dessert to any party your going, no one will guess you haven’t woken up at 6am to bake! So let me just say this once more – this is truly the perfect dessert.

I hope you enjoy the cake and have a lot of sparkles and joy in your December! ♡

raw vegan gingerbread cake raw vegan gingerbread cake


Raw Vegan Gingerbread Cake

into an 8-inch / 20 cm springform cake pan
serves 8-10

Crust:

2 cups walnuts (or pecan nuts and/or almonds)
2 teaspoons ceylon cinnamon
a pinch of sea salt
6-8 fresh dates, pitted

Filling:

2 cups / 225g cashew nuts (soaked overnight)
1 (400ml / 14oz) can full-fat coconut milk (refrigerated overnight)
1/2 cup extra virgin coconut oil
3-5 tablespoons organic honey (or coconut syrup or maple syrup)
2 teaspoons ceylon cinnamon
1/2 teaspoon ground cardamom
1/2 teaspoon ground ginger
1/2 teaspoon ground clove

Toppings:

about 50g raw chocolate (or dark chocolate)
pecans
dried coconut flakes
raw cacao nibs
fresh berries (I used cranberries)

METHOD:

1. Place the cashews in a big bowl, cover with water and soak overnight or for at least 4-6 hours until making the cake.

2. Start by preparing the crust. Add walnuts, cinnamon and salt into a blender or a food processor and grind until fine crumble. Cut the dates into smaller pieces and add in couple turns. Blend until you get a sticky dough. Line the bottom of a cake tin with baking paper and press the dough to the bottom of the cake tin. Place it in the freezer while making the filling.

3. Rinse the blender. Melt the coconut oil in a small saucepan on low heat until liquid. Drain and rinse the soaked cashews and add them into the blender. Open the coconut milk can and scoop out the white thick cream into the blender (don’t throw away the water left in the can). Add coconut oil, honey and spices and blend until smooth. If needed, add a bit of the coconut water left in the can to ease out the blending. Taste, and add sweetener or spices, if desired.

4. Take the cake tin from the freezer and pour the filling on top of the crust. Return to the freezer for 4-6 hours until the filling has set.

5. When the filling has set, take the cake from the freezer and remove the sides of the cake tin carefully. Melt the raw chocolate in a small saucepan on low heat and once it’s melted, pour the chocolate on top of the cake. Top with pecans, coconut flakes, raw cacao nibs and fresh berries and let thaw for about 15 minutes until cutting the cake.

6. The cake will remain good in the fridge for a couple of days, for longer periods, store in the freezer.


Homemade Natural Moisturizing Cream for Glowing Skin

Homemade Natural Moisturizing Cream for Glowing Skin

As now it’s officially Winter here up in the north (even though we’re still waiting for the snow!), the cold and dry air will continue to set a challenge for my skin. Having that sensitive type of skin I notice that my face and body crave huge amounts of moisture during these winter months. I tend to increase my take on good fats by eating a good amount of avocados, nuts and healthy oils, but I also like to move onto thicker and more nourishing creams and lotions. If you are looking for ways to keep your skin from harm, consider using the best zero waste dish soap which also protects your skin.

I made the switch to natural cosmetics a few years ago and since then I haven’t looked back. Even though there are so many great brands out there nowadays, I like to use simple things, so all kinds of oils are my favorites. I buy most of my cosmetics from health stores, sometimes I receive new products through this blog and then few times a year, I like to make my own scrubs and creams, like this homemade natural moisturizing cream that’s super nourishing – and a perfect gift for Christmas too.

This simple (but still so powerful!) cream is made from only three ingredients: shea butter, jojoba oil and orange essential oil. Even though it might seem like a lot of work, making homemade cosmetics is actually pretty easy and straightforward. And it’s a lot like baking, which is kind of fun. Just choose a good base, like shea butter, add in some oil (for example jojoba, almond, argan) and then finish with some essential oil, if you like. The oil could also be taken in the form of effusion by aroma diffusers. I love to use orange or lavender, but there are endless possibilities – just choose the one you like the most.

The only thing you need to be careful with, is making sure that all your jars, bowls and utensils are clean and dry, as water will bring bacteria into the cream. So be sure to have everything ready before you start and then enjoy the wonderful experience of making your own cream, that will make your skin glow through the whole winter. ♡

Homemade Natural Moisturizing Cream for Glowing Skin

250 grams shea butter
6 tablespoons jojoba oil
20-30 drops orange essential oil (or other essential oil)

+ 2 or 3 small airtight glass jars

METHOD:

1. Wash and dry glass jars very thoroughly, so that there’s not even the smallest drop of water in the jars. Also make sure that all the bowls and utensils you’re using are clean and dry.

2. Melt the shea butter in a water bath so that it only partly comes running. It can have some clumps left. Puree the shea butter with a hand mixer until smooth. The cream should be white and quite thick. If the shea butter melted completely and became an oil, put the mixture in the fridge for a while to solidify. The cream should be quite solid, so that it can be whipped to a foam.

3. Add the jojoba oil and orange essential oil into the cream and mix with a spoon until smooth. Beat with a hand mixer until creamy, like whipped cream. Spoon the cream into jars.

4. Store the cream at room temperature in airtight glass jars. The cream will remain good for several months.

Warming Gingerbread Latte (vegan)

Warming Gingerbread Latte (vegan)

vegan gingerbread latte vegan gingerbread latte

in cooperation with Asennemedia & Vallila Interior.

For the whole past autumn I’ve been somehow resenting Christmas. Whenever I’ve been talking about it with friends or family or thought about any gifts, decorations, parties or anything, there has been this loud voice yelling ‘NO NO NO’ in my mind. Instead of being excited I started to feel anxious and began to dream of running away to somewhere warm and imagined myself drinking fresh coconut water instead of mulled wine. How great that would be?

So as I noticed these feelings going around, I decided that this year I don’t have to do any of the usual Christmas things. And instead of being that hyper person I sometimes turn into this time of the year, I’m going to be the super chill one that hasn’t even heard about stress.

But then something happened a few days ago. I heard a Christmas song and liked it. And then there was a thought of making this classic rice porridge that we make here around Christmas time…and how about some gingerbread cookies…and maybe we could finally buy our own Christmas tree as well…and I could make a few decorations…and some diy gifts too…

My inner rebel started to feel a bit uncomfortable with all these happy thoughts. Maybe I’ll give up and become that hyper person or the rebel in me will maintain its strength and I’ll skip most of the hassle and just focus on a few of my favorite things. We’ll see how things work out, but I managed to create something rather delicious in this sudden burst on excitement. So let me present the most wonderful drink for the upcoming season: Gingerbread Latte!

vegan gingerbread latte vegan gingerbread latte

This warming gingerbread latte actually happened on the spur of the moment. I’d had these cups and kitchen cloths from Vallila’s new Christmas collection for a while already, as I was asked to style them with a christmassy recipe. I had thought about making some sort of a fancy dessert but then I hit me: a huge craving for gingerbread spices and something warm. I went through our cupboards, picked up a few things, threw them into a blender, poured the super creamy drink into a saucepan and heated it for a while until it was warm.

There it was.

A wonderfully creamy and spicy drink, that’s just perfect for these cold days. Before curling up to the sofa with the warm cup, I decided to go all out and whipped some coconut cream on top of the drink. Delicious.

I saved the rest for later and drank it cold. Delicious as well! So besides being a warm latte, this one’s like a smoothie too, which makes it a great dessert for any upcoming parties. Or screw the parties, make it just for yourself and take some luxurious me-time. And while your having a cup, maybe you’ll set your inner Christmas fanatic out or dream wildly of that runaway trip to somewhere warm.

So stay warm and enjoy the upcoming season in your own way, friends! ♡

vegan gingerbread latte

Warming Gingerbread Latte (vegan)

serves two

1/2 cup (120ml) cashews
1 3/4 cups (400ml) oat milk (or other plant-based milk)
1/2 cup (120ml) coconut milk
2-4 fresh pitted dates
2 teaspoons gingerbread spice mix (1 tsp ceylon cinnamon, 1/2 tsp cardamom, 1/4 tsp clove and 1/4 tsp ginger)
1/2 teaspoon vanilla extract
+ Gingerbread Coconut Cream for serving
+ ceylon cinnamon for serving

METHOD:

1. Add the cashews into a blender and grind until fine flour. (You can also soak the cashews for 6-8 hours if you like and then skip the grinding.) Add oat milk, coconut milk, dates and spices into the blender and blend until creamy and smooth. Taste, and add more dates or spices if desired. If you’d like to top the drink with Gingerbread Coconut Cream, prepare it before heating the drink.

2. Pour the drink into a small saucepan and heat on low-medium heat until the drink is warm enough. Pour into mugs, top with Gingerbread Coconut Cream and sprinkle some cinnamon on top. Serve and enjoy!

Gingerbread Coconut Cream

1 (14 ounce / 400ml) can full-fat coconut milk (refrigerated overnight)
1-3 tablespoons local honey (or maple syrup)
1 teaspoon gingerbread spice mix
1/2 teaspoon vanilla extract

METHOD:

Open the coconut milk can and scoop out the thick white cream into a big bowl. Beat with a mixer until creamy. Add sweetener and spices and mix until creamy and smooth. Taste and adjust sweetness as needed. If the mixture is too runny, place it in the fridge for a while. Store the leftover cream in the fridge and use within 3 days.

Pumpkin Apple Muffins (gluten + dairy free)

Pumpkin Apple Muffins (gluten + dairy free)

Pumpkin Apple Muffins (gluten + dairy free)

I’m sitting at our living room table, looking out the window and sipping on some chaga latte. Today has been gray and rainy, the leaves have fallen off the trees and the sun sets at four in the afternoon. This is Finland in November and sometimes it’s quite a challenge, especially if you’re working with food photography. But luckily we’ve had the most beautiful autumn so far and all is good here otherwise.

I’ve been spending a lot of time at home during the last few months, as I’ve been working with some exciting projects (that you’ll hear more about soon!). On most days I wake up early, do my morning meditation, have breakfast with my man and then move into our bedroom (which I’ve also turned into my office) and start working. I like having no specific work hours and the freedom that comes with it, but it also takes a bit of effort to keep myself organized. So I try to have lunch dates, take a couple of yoga classes and go for a run / walk / coffee with a friend every week. Or I might invite someone over if I’ve been developing a recipe or cooking a lot. These things help me to create a schedule and especially at this darker time of the year, it’s so important to see friends and do some nice things together.

Pumpkin Apple Muffins (gluten + dairy free)Pumpkin Apple Muffins (gluten + dairy free)These muffins happened last week, when I was craving for a baked good that would serve as a breakfast and a snack, something to keep me fueled while working. I had a bit of leftover pumpkin, as I’ve been cooking with it quite a lot lately. It’s so easy to roast a big batch of pumpkin in the oven and then use it in salads or turn it into a soup…or into muffins like these!

To make these muffins more tasty, I added some grated apple and a few spices to the dough, which make these grounding and really nourishing. I wouldn’t describe these as a dessert muffin, as they’re not really that sweet and they go well with a savory topping. I’ve been eating the with a slice of goat cheese and some avocado, but also with sliced banana and loved both combinations. So I recommend having these leisurely with a cup of tea, sliced in half and topped with something good you like or take one with you as you leave the house and enjoy it as a balanced snack. And let’s hope that these will keep us nourished and energized until the winter comes. Stay cozy, friends! ♡

Pumpkin Apple Muffins (gluten + dairy free)

Pumpkin Apple Muffins (gluten + dairy free)

notes: I imagine mashed sweet potato would also work here well. if you’d like to try a vegan version, replace the eggs with chia or flax eggs and use maple syrup instead of honey. and if you’d like to use another flour, go for it! at least brown rice and almond flour would work in these too.

makes 8 big muffins

2 apples
1 cup (240 ml) mashed pumpkin
2 eggs
3 tablespoons olive oil (or coconut oil)
3 tablespoons local honey (or maple syrup)

1 cup (240 ml) gluten free oat flour
1/2 cup (120 ml) buckwheat flour
1/4 cup (60ml) ground flaxseed
2 teaspoons baking powder
1/2 teaspoon baking soda
2 teaspoons ceylon cinnmon
1/2 teaspoon ground ginger
1/4 teaspoon ground nutmeg
a pinch salt
+ hemp seeds for decorating

METHOD:

1. Preheat the oven to 400°F / 200°C. Grate the apples and place into a large bowl together with the mashed pumpkin, eggs, olive oil and honey. Mix well.

2. In another bowl, mix all the dry ingredients. Pour the dry ingredients over the wet ingredients and stir until combined.

3. Grease a muffin pan or muffin tins with coconut oil and spoon the batter into about 8 big muffins. Sprinkle some hemp seeds on top if you like. Bake for about 18-22 minutes until a toothpick inserted in the middle comes out clean. Let cool and then enjoy!